1. 환경설정
by 볼빵빵오춘기Database 설정
create user 'cos'@'%' identified by 'cos1234';
GRANT ALL PRIVILEGES ON *.* TO 'cos'@'%';
create database security;
use security;
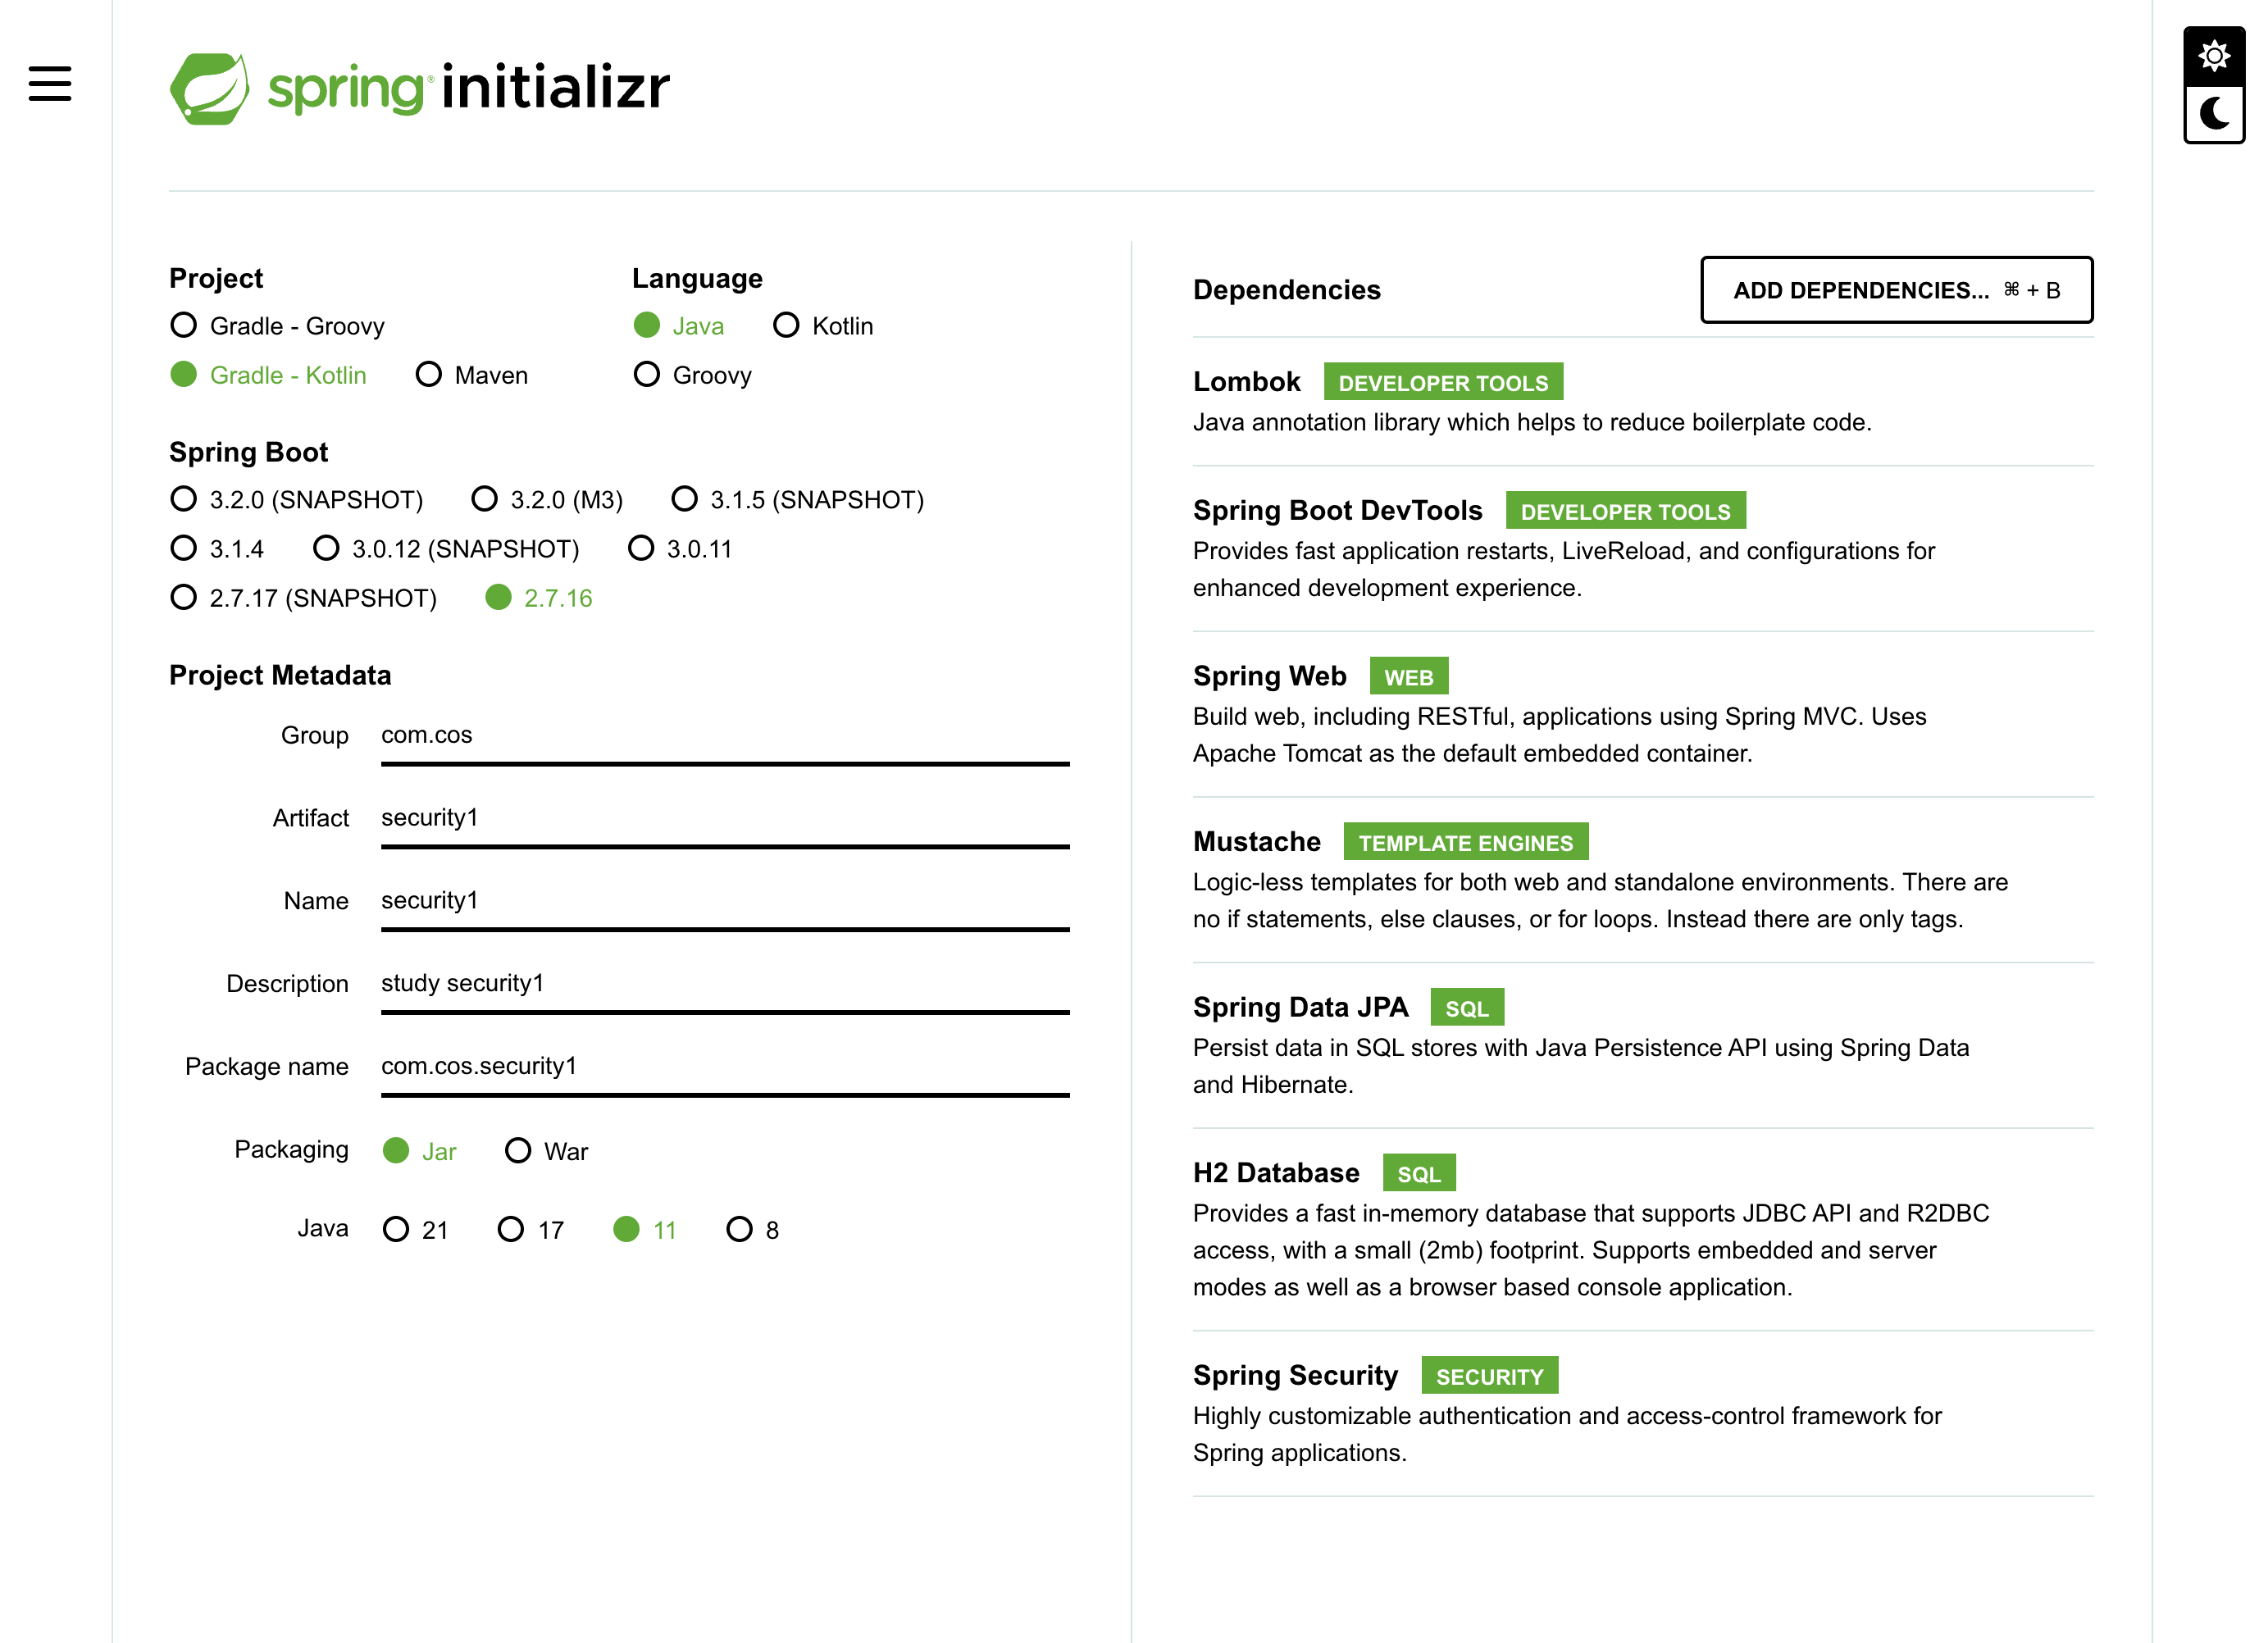
Spring Project 만들기
application.properties
※ 강의에서는 application.yml 사용
spring.jpa.hibernate.ddl-auto=create 는 추후 update 로 변경
#h2 console
spring.h2.console.enabled=true
spring.h2.console.path=/h2-console

#h2 db
spring.datasource.url=jdbc:h2:tcp://localhost/~/test
spring.datasource.driverClassName=org.h2.Driver
spring.datasource.username=sa
spring.datasource.password=
spring.jpa.database-platform=org.hibernate.dialect.H2Dialect
spring.jpa.properties.hibernate.dialect=org.hibernate.dialect.H2Dialect

#hibernate
spring.jpa.properties.hibernate.format_sql=true
spring.jpa.properties.hibernate.show_sql=true
spring.jpa.hibernate.ddl-auto=create
spring.jpa.hibernate.naming.physical-strategy=org.hibernate.boot.model.naming.PhysicalNamingStrategyStandardImpl

#mvc
spring.mvc.view.prefix=/templates/
spring.mvc.view.suffix=.mustache

#session
server.servlet.session.cookie.sameSite=none
server.servlet.session.cookie.secure=true

#view 설정
server.servlet.context-path=/
server.servlet.encoding.charset=UTF-8
server.servlet.encoding.enabled=true
server.servlet.encoding.force=true
IndexController
- 템플릿엔진을 mustache 사용한다.(mustache는 스프링에서 사용권장 템플릿엔진)
- mustache는 기본폴더 src/main/resources/ 로 잡힌다.
- View Resolver 설정 : templates (prefix), .mustache(suffix) (설정은 application.properties 에 해놓았다.)
더보기
spring.mvc.view.prefix=/templates/
spring.mvc.view.suffix=.mustache
하지만 이 부분 필요 없으므로 주석처리 or 삭제한다.
why? mustache를 사용하겠다고 의존성 등록을 해놓은 상태이기 때문이다.(build.gradle.kts에서 확인가능)
// build.gradle.kts
dependencies {
	implementation("org.springframework.boot:spring-boot-starter-data-jpa")
	implementation("org.springframework.boot:spring-boot-starter-mustache")
	implementation("org.springframework.boot:spring-boot-starter-security")
	implementation("org.springframework.boot:spring-boot-starter-web")
	compileOnly("org.projectlombok:lombok")
	developmentOnly("org.springframework.boot:spring-boot-devtools")
	runtimeOnly("com.h2database:h2")
	annotationProcessor("org.projectlombok:lombok")
	testImplementation("org.springframework.boot:spring-boot-starter-test")
	testImplementation("org.springframework.security:spring-security-test")
}
@Controller
public class IndexController {
@GetMapping({"","/"})
public String index(){
// 머스테치 기본폴더 src/main/resources/ 로 잡힌다.
// 뷰리졸버 설정 : templates (prefix), .mustache(suffix)
return "index";
}
}
index.html
확장자가 html로 만든다.
mustache로 확장자를 하면 만들 때 까다로워진다.
그럼 mustache로 설정이 되어있는데 어떻게 하나? (WebMvcConfig에서 설정한다.아래 코드 참고)
<!DOCTYPE html>
<html lang="en">
<head>
    <meta charset="UTF-8">
    <title>index</title>
</head>
<body>
    index !!!
</body>
</html>
WebMvcConfig
WebMvcConfigurer 을 상속 받은 뒤 configureViewResolvers 를 오버라이드 해준 후 아래와 같이 코드 변경한다.
@Configuration
public class WebMvcConfig implements WebMvcConfigurer {

    @Override
    public void configureViewResolvers(ViewResolverRegistry registry) {
        MustacheViewResolver resolver = new MustacheViewResolver();

        resolver.setCharset("UTF-8");
        resolver.setContentType("text/html;charset=UTF-8");
        resolver.setPrefix("classpath:/templates/");
        resolver.setSuffix(".html");

        registry.viewResolver(resolver);
    }
}
실행 결과
http://localhost:8080/을 쳤는데 http://localhost:8080/login 로 넘어가는 것을 확인할 수 있다.
why? security 의존성등록을 해놓았기 때문에 모든 url이 인증이 필요한 부분으로 된다. 따라서 로그인화면부터 나온다.

로그인 화면이 뜨는데 최초에는 Username은 user 이고 Password는 실행시킬 때 console에 password가 뜬다.
console의 password 복사해서 넣는다. 그런 후에 index.html 이 화면에 뜨는것을 확 할 수 있다.
'강의 따라하기 > Security1' 카테고리의 다른 글
| 6. 시큐리티 권한처리 (0) | 2024.02.27 |
|---|---|
| 5. 시큐리티 로그인 (0) | 2024.02.27 |
| 4. 시큐리티 회원가입 (0) | 2024.01.14 |
| 3. 시큐리티 설정 (1) | 2024.01.14 |
| 스프링부트 - Security1 프로젝트 (1) | 2024.01.14 |
블로그의 정보
Hello 춘기's world
볼빵빵오춘기